

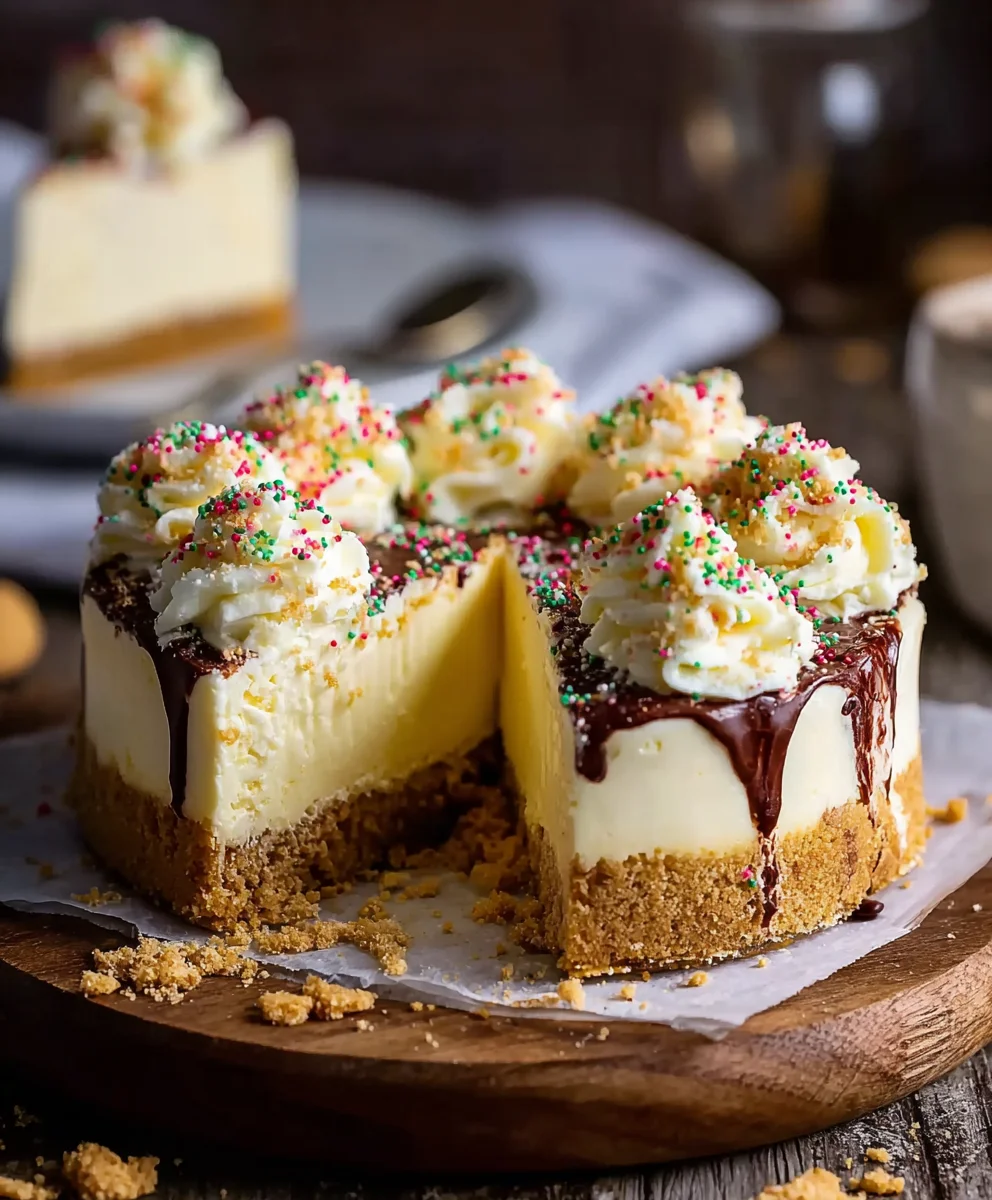
Sugar Cookie Cheesecake – have you ever dreamt of a dessert that perfectly marries the festive cheer of a classic sugar cookie with the luxurious, velvety richness of a New York-style cheesecake? Today, I am absolutely thrilled to share a recipe that brings this delicious dream to life, offering an unparalleled treat that will undoubtedly become a new favorite in your culinary repertoire.
There’s something inherently nostalgic and comforting about a sugar cookie, often evoking cherished memories of holiday baking, childhood joy, and frosted celebrations. Cheesecake, on the other hand, embodies elegance and indulgent satisfaction. This
Sugar Cookie Cheesecake is a modern culinary marvel, born from a desire to combine these beloved textures and flavors into one show-stopping dessert. It’s not steeped in centuries of history, but its significance lies in its ingenious fusion – a testament to how traditional comforts can evolve into something spectacularly new.
People adore this dish for countless reasons. Imagine a buttery, slightly crisp sugar cookie crust, giving way to an incredibly smooth, sweet, and subtly almond-vanilla flavored cheesecake filling that tastes uncannily like a perfectly baked sugar cookie. It’s the ultimate crowd-pleaser, delivering familiar comfort with an upscale twist. Its delightful taste and unique texture make it an irresistible choice for any gathering, from casual family dinners to sophisticated holiday parties. I promise, one bite and you’ll understand why this creation is so utterly captivating!
Ingredients:
For the Sugar Cookie Crust:
- 24 ounces (approximately 30-36 cookies) of store-bought soft-baked sugar cookies. I love using the Lofthouse-style cookies with the colorful frosting, but any good quality, slightly chewy sugar cookie will work beautifully here. If you prefer, you can use homemade sugar cookies, just ensure they are fully cooled before proceeding.
- 8 tablespoons (1 stick or 113g) unsalted butter, melted. Unsalted butter gives you more control over the overall saltiness of the dish, allowing the sweet sugar cookie flavor to truly shine.
- 2 tablespoons granulated sugar (optional). This is for an extra touch of sweetness and helps to bind the crust a bit more, especially if your cookies aren’t super sweet already.
- ¼ teaspoon fine sea salt (optional, but recommended). A tiny pinch of salt in a sweet crust truly elevates the flavor, providing a pleasant contrast.
For the Cheesecake Filling:
- 32 ounces (four 8-ounce blocks) full-fat cream cheese, softened to room temperature. This is absolutely crucial for a smooth, lump-free cheesecake. Plan to take it out of the fridge at least 2-3 hours before you start mixing.
- 1 ½ cups (300g) granulated sugar. This provides the perfect level of sweetness, complementing the sugar cookie crust without being overly saccharine.
- ¼ cup (57g) sour cream or full-fat Greek yogurt, at room temperature. This adds a lovely tang and helps achieve that signature creamy, velvety texture. Make sure it’s also at room temperature to prevent lumps.
- 1 tablespoon pure vanilla extract. Don’t skimp on the quality here; a good vanilla extract makes a significant difference in the overall flavor profile.
- ½ teaspoon almond extract (optional, but highly recommended). This secret ingredient truly enhances the “sugar cookie” essence of the cheesecake, mimicking that classic bakery cookie flavor.
- 4 large eggs, at room temperature. Just like the cream cheese, room temperature eggs emulsify much better into the batter, leading to a smoother texture.
- 2 tablespoons all-purpose flour or cornstarch. This acts as a stabilizer, helping to prevent cracks in your cheesecake and giving it a slightly firmer, yet still creamy, consistency.
For the Whipped Cream Topping (Optional, but highly encouraged!):
- 2 cups heavy cream or heavy whipping cream, very cold. Chilled cream whips up much faster and holds its peaks better.
- ½ cup powdered sugar (confectioners’ sugar). This sweetens the cream and also helps to stabilize it.
- 1 teaspoon pure vanilla extract. Again, a good quality vanilla will make your whipped cream exceptional.
- Colorful sprinkles, for garnish. Because what’s a sugar cookie cheesecake without a festive sprinkle finish?
- Extra crumbled sugar cookies, for garnish (optional). A few extra crumbs on top visually reinforce the “sugar cookie” theme.
Equipment You’ll Need:
- 9-inch springform pan: A must-have for cheesecakes, as it allows for easy removal and a beautiful presentation.
- Aluminum foil: Heavy-duty wide foil is best for wrapping the springform pan to prevent water bath leakage.
- Large roasting pan: For the water bath. Ensure it’s large enough to hold the springform pan with a couple of inches to spare around the sides.
- Food processor: Highly recommended for quickly crushing the sugar cookies into fine crumbs. If you don’t have one, a large zip-top bag and a rolling pin will work!
- Electric mixer (stand or hand-held): Essential for properly creaming the ingredients for the filling.
- Large mixing bowls: Several are needed for different stages of preparation.
- Rubber spatula: For scraping down the sides of bowls and gently folding.
- Measuring cups and spoons: For accurate ingredient proportions.
- Oven thermometer (optional, but recommended): To ensure your oven is at the correct temperature.
Instructions:
Preparing Your Workspace and Ingredients:
- Before you even think about mixing, take out your cream cheese, sour cream (or Greek yogurt), and eggs. Allow them to sit on the counter for at least 2-3 hours to come to a proper room temperature. This step is non-negotiable for a perfectly smooth, lump-free cheesecake filling. Cold ingredients will lead to a lumpy batter, no matter how long you mix.
- Preheat your oven to 350°F (175°C). It’s important to give your oven ample time to fully preheat to the correct temperature, ensuring even baking.
- Prepare your 9-inch springform pan. I like to lightly grease the bottom of the pan with a little butter or cooking spray. Then, line the bottom with a circle of parchment paper. This helps tremendously with easy removal after chilling.
- Wrap the outside of your springform pan with two layers of heavy-duty aluminum foil. Make sure the foil extends all the way up the sides and over the top edge of the pan. This is crucial for preventing water from seeping into the crust when we use a water bath during baking.
Phase 1: Crafting the Perfect Sugar Cookie Crust
- In a food processor, add the 24 ounces of sugar cookies. Pulse them until they form fine, even crumbs. You want them to resemble coarse sand. If you don’t have a food processor, place the cookies in a large, sturdy zip-top bag, seal it, and crush them with a rolling pin until uniformly fine. Take your time with this step; evenly crushed cookies make for a superior crust.
- Melt the 8 tablespoons of unsalted butter. You can do this in a microwave-safe bowl in 20-second increments or in a small saucepan over low heat. Be careful not to brown the butter.
- In a medium-sized mixing bowl, combine the crushed sugar cookie crumbs, the optional 2 tablespoons of granulated sugar, and the optional ¼ teaspoon of fine sea salt. Whisk them together with a fork until well combined.
- Pour the melted butter over the cookie crumb mixture. Use a rubber spatula or your hands to mix thoroughly until all the crumbs are moistened and resemble wet sand. Every crumb should be coated; this is what holds the crust together.
- Press the mixture evenly into the bottom of your prepared springform pan. I find it easiest to use the bottom of a flat-bottomed glass or a measuring cup to firmly press the crumbs into an even layer. Make sure the edges are well-compacted. A firm crust is a happy crust!
- Place the springform pan with the crust into your preheated 350°F (175°C) oven. Bake for 10-12 minutes, or until the crust is lightly golden brown and fragrant. This pre-baking step helps to set the crust, preventing it from becoming soggy once the filling is added.
- Remove the crust from the oven and set it aside to cool slightly while you prepare the cheesecake filling. You can even place it in the freezer for about 10 minutes to speed up the cooling process if you’re in a hurry.
Phase 2: Mixing the Velvety Sugar Cookie Cheesecake Filling
- In the bowl of a stand mixer fitted with the paddle attachment (or using a large mixing bowl with a hand-held electric mixer), add the softened cream cheese. Begin beating on low speed for about 1-2 minutes until it’s completely smooth and creamy, with no lumps whatsoever. Avoid over-mixing at this stage, as incorporating too much air can lead to cracks later. We’re just looking for smoothness.
- Gradually add the 1 ½ cups of granulated sugar to the cream cheese, beating on low speed until just combined and smooth. Scrape down the sides of the bowl frequently with a rubber spatula to ensure everything is incorporated. Continue to beat until the mixture is light and fluffy, usually another 2-3 minutes.
- Add the room temperature sour cream (or Greek yogurt), 1 tablespoon of pure vanilla extract, and the ½ teaspoon of almond extract (if using) to the cream cheese mixture. Beat on low speed until just combined. Again, scrape down the bowl. The almond extract is subtle but truly makes this taste like a classic sugar cookie.
- In a separate small bowl, whisk together the 2 tablespoons of all-purpose flour or cornstarch with about 2 tablespoons of the cream cheese mixture from the bowl to create a slurry. This helps prevent the flour/cornstarch from clumping when added to the main batter. Alternatively, you can just sift it directly over the cream cheese mixture and beat on low until just combined.
- Add the flour/cornstarch mixture to the cream cheese batter. Beat on low speed for about 30 seconds until fully incorporated. This acts as a wonderful stabilizer for your cheesecake.
- Now, it’s time for the eggs. Add the 4 large, room temperature eggs, one at a time. After each egg, beat on the lowest speed possible just until the yolk disappears into the batter. This is another critical step to prevent over-mixing and incorporating too much air, which can cause cracking during baking. Scrape down the bowl after each egg addition.
- Once the last egg is just barely incorporated, give the batter one final, gentle scrape with your rubber spatula to ensure everything is fully mixed from the bottom and sides of the bowl. The batter should be incredibly smooth and pourable.
- Carefully pour the cheesecake filling over the slightly cooled sugar cookie crust in the prepared springform pan. Gently tap the pan on the counter a few times to release any large air bubbles that may be trapped.
Phase 3: The Baking and Cooling Process
- Before placing your cheesecake in the oven, you’ll need to set up a water bath (bain-marie). This creates a moist, gentle baking environment that prevents cracking and ensures an incredibly creamy, evenly cooked cheesecake.
- Place the foil-wrapped springform pan into a larger roasting pan. Carefully pour hot (not boiling) water into the roasting pan, ensuring it comes about halfway up the sides of the springform pan. Be very careful not to splash water into the cheesecake batter.
- Carefully transfer the roasting pan with the cheesecake to your preheated 350°F (175°C) oven.
- Bake for 60-75 minutes. The baking time can vary, so you’ll need to watch for visual cues. The cheesecake is done when the edges are set, and the center 2-3 inches still have a slight jiggle to them when you gently shake the pan. It will look slightly underdone in the very center, but trust me, it will continue to cook and set as it cools.
- Once the cheesecake reaches the desired doneness, turn off the oven. Crack the oven door open slightly (you can wedge a wooden spoon in the door). Leave the cheesecake in the oven for another hour as the oven slowly cools. This slow, gradual cooling process is another key factor in preventing cracks and ensures a perfectly set texture.
- After an hour, carefully remove the cheesecake from the oven and lift it out of the water bath. Remove the foil from around the springform pan. Place the cheesecake on a wire rack to cool completely at room temperature for at least 2-3 hours. It’s important to let it cool down gradually before moving it to the fridge.
- Once it’s completely cooled to room temperature, cover the cheesecake loosely with plastic wrap and transfer it to the refrigerator. Chill for a minimum of 6-8 hours, but preferably overnight. This chilling time is absolutely essential for the cheesecake to fully set, develop its flavors, and achieve that perfect dense, creamy texture. Patience is a virtue when making cheesecake!
Phase 4: Whipped Cream Topping and Final Assembly
- Once your cheesecake is thoroughly chilled, it’s time to prepare the topping! In a large, very cold mixing bowl (you can chill the bowl and whisk attachment in the freezer for 10-15 minutes beforehand), pour the 2 cups of very cold heavy cream.
- Start beating the heavy cream on medium-low speed, gradually increasing to medium-high speed.
- As the cream begins to thicken and form soft peaks, gradually add the ½ cup of powdered sugar and 1 teaspoon of pure vanilla extract. Continue beating until stiff peaks form. Be careful not to over-beat, or you’ll end up with butter! The whipped cream should be light, airy, and hold its shape well.
- To remove the cheesecake from the springform pan, first, run a thin knife or offset spatula around the inside edge of the pan. This helps to loosen the cheesecake from the sides. Then, unlatch the springform collar and gently lift it away. You can leave the cheesecake on the bottom of the pan for serving, or carefully slide it onto a serving plate.
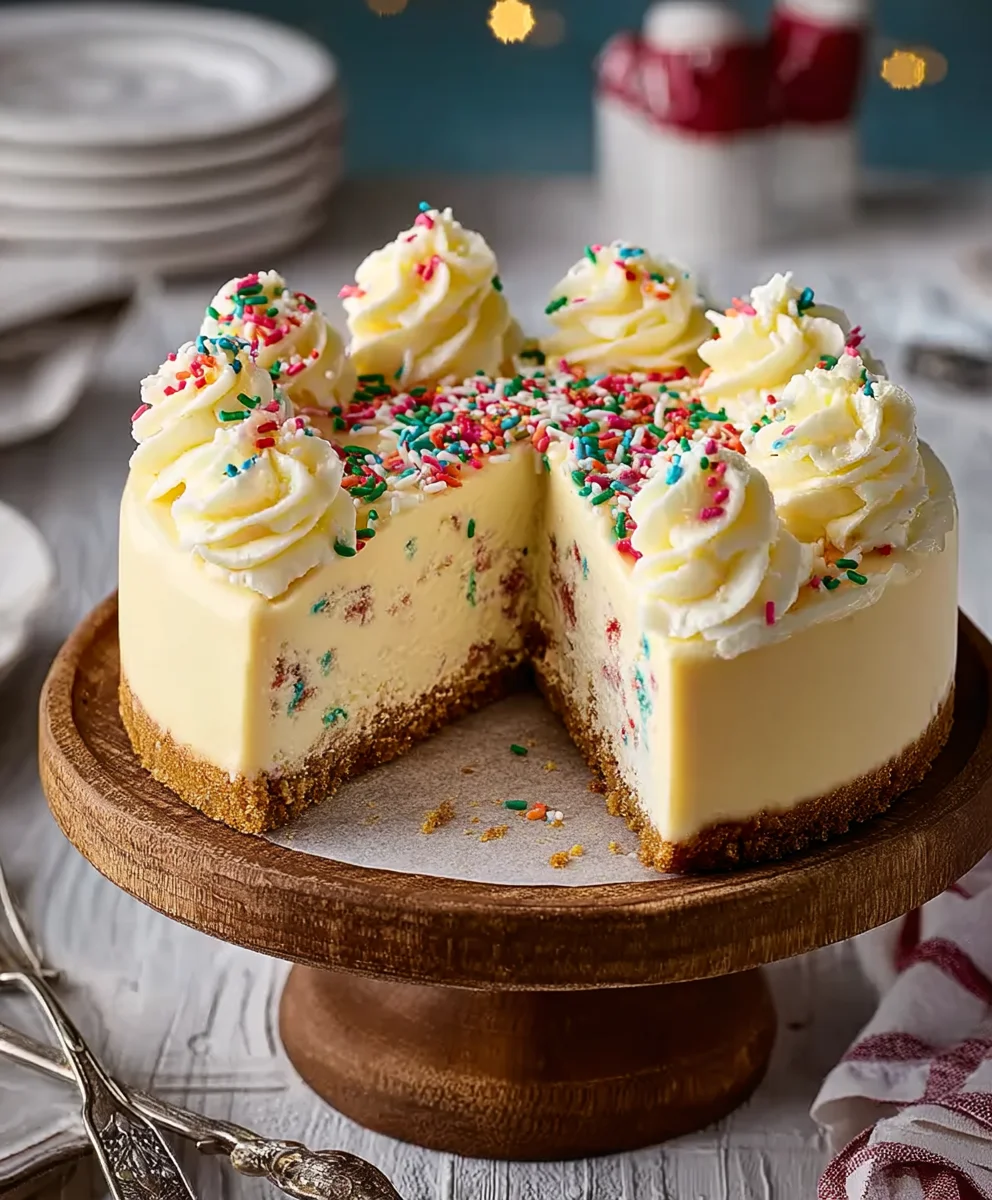
- Spread or pipe the homemade whipped cream generously over the top of the chilled cheesecake. You can use an offset spatula for a rustic spread or a piping bag with a decorative tip for a more elegant presentation.
- Finish your Sugar Cookie Cheesecake with a festive shower of colorful sprinkles and, if you like, some extra crumbled sugar cookies. The vibrant colors and added texture make this dessert truly irresistible and perfectly on-theme.
Storage and Serving Suggestions:
- Store any leftover cheesecake in an airtight container in the refrigerator for up to 5-7 days. The flavors often deepen and become even more delightful the day after it’s made.
- For the best taste and texture, allow the cheesecake to sit at room temperature for about 15-20 minutes before serving. This takes the chill off just enough to bring out the full complexity of its creamy texture and sweet, nostalgic flavors. Serve in generous slices and watch it disappear!
Conclusion:
And there you have it, my friends! We’ve reached the sweet finale of our journey, and I genuinely hope you’re feeling as inspired and hungry as I am right now. This isn’t just another dessert recipe; it’s a truly special creation that brings together two beloved classics in a harmony of flavors and textures that is nothing short of magical. Imagine the delightful chewiness of a classic sugar cookie, transformed into the perfect buttery crust, providing the foundational embrace for an incredibly smooth, rich, and subtly tangy cheesecake filling. That, my friends, is the irresistible allure of this Sugar Cookie Cheesecake.
I simply cannot emphasize enough why this particular recipe is an absolute must-try for anyone who loves baking, anyone who loves eating, or anyone who just wants to bring a little extra joy into their home. It’s the kind of dessert that elicits gasps of delight and requests for “just one more slice.” Its beauty lies not just in its stunning presentation but in the comforting familiarity of its components, elevated to an extraordinary level. The creamy, velvety texture of the cheesecake is perfectly balanced by the sweet, tender bite of the sugar cookie crust, making every forkful a symphony of indulgence. It’s truly a showstopper for any gathering, yet surprisingly approachable for the home baker.
Serving Suggestions and Creative Variations to Elevate Your Sugar Cookie Cheesecake:
While this cheesecake is utterly divine on its own, here’s where you can truly let your creativity shine! For a simple yet elegant finish, a dollop of freshly whipped cream and a scattering of fresh berries (strawberries, raspberries, or blueberries work wonderfully) provide a beautiful contrast in color and a burst of fresh flavor. A drizzle of homemade caramel sauce or a rich chocolate ganache can also turn this dessert into an even more decadent experience. Feeling festive? Consider decorating the top with holiday-themed sprinkles before chilling, or even use different cookie cutters to create mini sugar cookie shapes to place on top just before serving. For a truly unique twist, you could swirl a fruit compote (like cherry or mixed berry) into the cheesecake batter before baking for a vibrant marbling effect.
Don’t be afraid to experiment with the crust itself! While classic sugar cookies are the star, a gingerbread cookie crust would be phenomenal for the holiday season, or even a shortbread cookie for a slightly different buttery note. Want to add a subtle hint of almond to your cheesecake? A tiny dash of almond extract in the filling can really make the flavors pop. And for those who love individual portions, this recipe can easily be adapted into adorable mini cheesecakes baked in cupcake liners or even cheesecake bars in a square pan. The possibilities are truly endless, allowing you to tailor this incredible dessert to your taste and occasion.
So, now it’s your turn! I’ve shared my passion for this incredible dessert, and now I’m genuinely excited for you to experience the magic firsthand. Don’t hesitate, grab your ingredients, and dive into the wonderful world of baking this exceptional creation. I promise you, the smiles and satisfied sighs you’ll receive will be all the reward you need. Once you’ve whipped up your own masterpiece, I would absolutely love to hear about it! Please, share your experience, your photos, and any creative twists you added in the comments below or tag me on social media. Your culinary adventures inspire me, and I can’t wait to see your stunning results. Happy baking, and get ready to fall in love with your new favorite dessert!
People Also Ask:
Can I make Sugar Cookie Cheesecake ahead of time?
Yes, absolutely!
Cheesecakes are fantastic make-ahead desserts because they require a significant chilling time anyway. You can prepare this Sugar Cookie Cheesecake entirely up to 2-3 days in advance. Just make sure it’s properly cooled, covered tightly with plastic wrap or foil, and stored in the refrigerator. In fact, many people find that the flavors meld and deepen even further after a day or two in the fridge, making it even more delicious.
How do I store Sugar Cookie Cheesecake?
To store your Sugar Cookie Cheesecake, allow it to cool completely at room temperature, then chill it in the refrigerator for the recommended time (usually at least 4-6 hours, or preferably overnight) until it’s firm. Once firm, cover the cheesecake tightly with plastic wrap or aluminum foil to prevent it from absorbing any odors from the refrigerator and to keep it fresh. Store it in the refrigerator for up to 3-5 days. For longer storage, see the freezing instructions below.
Can I freeze Sugar Cookie Cheesecake?
Yes, you can!
Cheesecake freezes beautifully. After it has fully chilled and firmed up in the refrigerator, you can freeze it whole or in individual slices. To freeze whole, place the uncovered cheesecake in the freezer for about an hour until firm. Then, wrap it tightly in several layers of plastic wrap, followed by a layer of aluminum foil. To freeze slices, wrap each slice individually in plastic wrap and then foil. Frozen cheesecake can be stored for up to 1-2 months. When you’re ready to enjoy it, simply thaw it in the refrigerator overnight or for several hours before serving.
What kind of sugar cookies should I use for the crust?
For the best results, I recommend using a good quality store-bought sugar cookie (like a roll of refrigerated dough that you bake yourself and then crumble, or pre-baked, crisp sugar cookies). You can also use your favorite homemade sugar cookie recipe! The key is to have a sugar cookie that isn’t overly soft or chewy, as you want it to crisp up slightly when baked as a crust. Avoid excessively soft or frosted sugar cookies, as they might make the crust too greasy or sweet. Plain, classic sugar cookies work best to provide that buttery, sweet base.
How do I prevent cracks in my Sugar Cookie Cheesecake?
Preventing cracks in cheesecake is a common concern! Here are my top tips:
-
Don’t overmix the batter:
Overmixing incorporates too much air, which expands during baking and contracts during cooling, causing cracks. Mix just until combined.
-
Bake in a water bath:
A water bath provides a moist, even heat that helps the cheesecake cook gently and prevents the edges from drying out and cracking.
-
Don’t overbake:
The center should still have a slight jiggle when you gently shake the pan. It will continue to cook and set as it cools.
-
Cool gradually:
Once baked, turn off the oven and leave the cheesecake inside with the oven door slightly ajar for about an hour. This gradual cooling process helps prevent sudden temperature changes that can lead to cracks.
-
Run a knife around the edges:
After removing it from the oven and before fully cooling, carefully run a thin knife around the edge of the cheesecake to release it from the pan. This can prevent cracks as the cheesecake naturally shrinks slightly while cooling.
Can I make this Sugar Cookie Cheesecake recipe gluten-free?
Absolutely!
Making this Sugar Cookie Cheesecake gluten-free is quite simple. The main adjustment you’ll need to make is for the sugar cookie crust. You can either use a store-bought gluten-free sugar cookie mix or pre-baked gluten-free sugar cookies for your crust. Ensure that all other ingredients in the cheesecake filling (like cream cheese, sugar, eggs, etc.) are naturally gluten-free or certified gluten-free. Always double-check ingredient labels if you have severe gluten sensitivities.
Sugar Cookie Cheesecake
A delightful dessert that perfectly marries the festive cheer of a classic sugar cookie with the luxurious, velvety richness of a cheesecake. Featuring a homemade sugar cookie crust and a creamy, subtly vanilla-flavored cheesecake filling, it’s a show-stopping treat for any occasion.
Ingredients
-
1 1/2 cups all-purpose flour
-
1/2 cup unsalted butter, softened
-
1/4 cup granulated sugar
-
1 egg
-
1 teaspoon vanilla extract
-
1/2 teaspoon baking powder
-
1/4 teaspoon salt
-
2 (8 oz) packages cream cheese, softened
-
1 cup granulated sugar
-
1 teaspoon vanilla extract
-
2 large eggs
-
1/4 cup sour cream (optional)
-
1 tablespoon all-purpose flour
-
Whipped cream (optional)
-
Sugar sprinkles (optional)
Instructions
-
Step 1
Combine 1 1/2 cups all-purpose flour, 1/2 cup softened unsalted butter, 1/4 cup granulated sugar, 1 egg, 1 tsp vanilla extract, 1/2 tsp baking powder, and 1/4 tsp salt to form cookie dough. Press dough evenly into a lightly greased 9-inch springform pan. Bake at 350°F (175°C) for 10-12 minutes until lightly golden. Remove and let cool slightly. -
Step 2
Ensure cream cheese, sour cream, and eggs are at room temperature. In a mixer, beat 16 oz softened cream cheese until completely smooth. Gradually add 1 cup granulated sugar and 1 tsp vanilla extract; beat until combined. Mix in 1 tbsp all-purpose flour. Add 2 large eggs one at a time, beating on the lowest speed just until yolk disappears. (Optional: gently fold in 1/4 cup sour cream). -
Step 3
Pour filling over the cooled crust in the prepared springform pan. Wrap the outside of the springform pan with two layers of heavy-duty aluminum foil. Place the foil-wrapped pan into a larger roasting pan. Carefully pour hot water into the roasting pan, ensuring it comes halfway up the sides of the springform pan. -
Step 4
Carefully transfer the roasting pan with the cheesecake to a preheated 350°F (175°C) oven. Bake for 60-75 minutes, or until the edges are set and the center 2-3 inches still have a slight jiggle. -
Step 5
Once baked, turn off the oven and crack the oven door open slightly. Leave the cheesecake in the oven for 1 hour to cool slowly. Then, remove from oven, lift out of water bath, and remove foil. Place on a wire rack to cool completely at room temperature for 2-3 hours. -
Step 6
Once completely cooled to room temperature, cover loosely and transfer to the refrigerator. Chill for a minimum of 6-8 hours, but preferably overnight, for best setting and flavor. -
Step 7
Once thoroughly chilled, remove from springform pan. Spread or pipe whipped cream (optional) generously over the top. Finish with a festive shower of sugar sprinkles (optional). For best taste, allow to sit at room temperature for 15-20 minutes before serving.
Important Information
Nutrition Facts (Per Serving)
It is important to consider this information as approximate and not to use it as definitive health advice.
Allergy Information
Please check ingredients for potential allergens and consult a health professional if in doubt.


Leave a Comment